|
The plan was for a 20"
reflector mainly for use with a CCD camera.
I choose to start with a 1" thick plate glass blank,
mainly on the grounds of cost.
For the sake of the CCD chip and to keep the size of the scope
down I went for a focal ratio of 4.
The sagitta depth required it a horrific 1/3 inch.
Fearing I might spend the rest of my life hogging out I took a
look though the ATM list archives and found a few threads and sites
detailing the use of diamond cutters for rough grinding.
Ricardo
Dunna's
and Peter
Smith's sites
describe what is possible but the methods require a mirror making
machine or a drill press. I have neither. The
TRO
site is a good description of the low-tech approach of pivoting the
cutter at the centre of curvature.
I adopted a similar method but choose to suspend the cutter for
the roof of my garage.
|
This
is a schematic of the curve generator. |
|
|
So starting at the top.
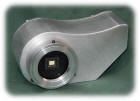
Here is a very poor picture of the top pivot point high in
the roof of the garage.
The pivot is a ball and socket affair while the top of the
arm is 1 1/2 " square wood |
 |
|
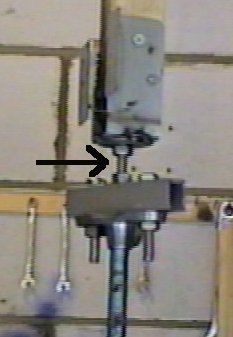
Control
over the depth of cut is by bolt arrowed.
I welded some washers into the top of this joint to help
stiffen things up. |
 |
.
|
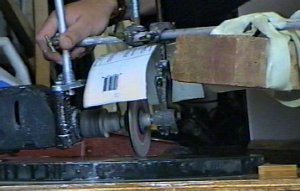
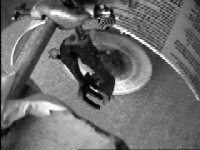
This is the cutter in action.
The point of contact on the glass is directly under the
pivot arm. The brick
acts as counter weight (its actually bolted to the horizontal rod,
the tape being insurance).
|
 |
|
Another picture of the disc.
The disc is from a tile cutter and cost £10.
The spindle is a bolt and 2 nyloc nuts keep the disc in
place. The rubber
backing of a drill sander attachment is used behind the disc to
provide support at the edge to the disc and acts as a clutch.
The spindle bolt was pressed into a bearing to provide more
support. |
 |
|
 |
After ~12 hours worth of cutting this is the
result. The marks on
the surface aren't very deep and should soon come out. |
 |
Pros: I am really happy with the results.
The speed with which the cutter removes glass is amazing.
The bulk of the glass was removed in 2 cuts of about 3mm a
time. This meant the side
of the cutter was doing the work rather than the edge.
Still the diamond disc held up really well and looks good for
another 3 or 4 mirrors, even if I'm not.
Cons:
Nothing serious. Water
tends to get everywhere.
Bit of playing around with glass placement required to keep
ground dish concentric with blank.
|
 |
The
IMPORTANT bit.
If you are thinking of doing something similar
remember.
i. Use an RCD on the power supply.
ii. Use lots of water to disperse ground glass
and prevent dust.
iii. Safety specs and dust masks are a must
|
|