Part 1 Mirror Making
Mirror Grinding
Telescope 2s one big failing is the time it
takes to set up. What I wanted in addition
to scope 2 was a portable Dobson. To make
building a third scope more of a challenge and
partly to keep costs down I ground the mirror
myself.
For guidance I relied upon "How to make
a Telescope" by Texereau and advice given
in the ATM
FAQ files.
The 10" Pyrex blank I bought mail order
was distinctly convex. Its probably worth
specifying a flat blank when ordering to prevent
a manufacturer sending out a blank they don't
fancy grinding themselves. Anyway a week
later and a lot of course grit the blank was
starting to go concave. A lot of ATMers
recommend plaster and tile tools especially
dental plaster. I found casting tools from
100% portland cement really effective.
After 4-5 days drying the tools can be varnished
and 1" ceramic tile squares epoxyed
to them.
I had decided to go for as faster mirror as I
felt I could figure, f4.5. However before
the mirror than been ground deep enough I had
run out of course grit. Rather than buy
more I continued by using sandblasting grit.
This doesn't last long before turning to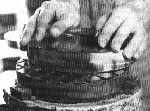 sludge but as its really cheap you can just add
more fresh.
sludge but as its really cheap you can just add
more fresh.
When the mirror gets to the required depth
its worth casting 2 more tools using the blank
as the bottom of the mould. One can be
tiled and used for the medium grits ( with no
danger on contamination with course grit ) while
the other is ready for the pitch.
The grinding using the medium and fine grits
went very smoothly, perhaps because of the
sandblasting grit used in the previous stage.
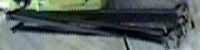
The pitch was cast in 3/4" strips in a
mould lined with kitchen foil. These were
cut into squares slightly melted and stuck to
the tool. If I do this again I will also
make a subdiameter pitch on plywood lap at the
same time to help with figuring.
During polishing the channels in the lap
closed up twice and were re-opened by using an
old soldering iron.
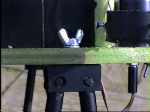
A Foucault tester was made to assess the
progress of figuring. This was made
according to the instructions in Texereau's book
down to the use of a 12V car stop lamp as a
light source. With hindsight the wattage's
of these bulbs must of gone up in the 80 years
since the book was written as this bulb was
really to powerful. On the negative side I
ended up with a burnt forehead but more
positively the test could easily be performed
without plunging the room into total darkness.
Above are
the final graphs from TEX. The focal ratio
ended up 4.4
Silvering
Rather than send the mirror off for aluminising
I decided to silver the mirror myself. It
worth mentioning here that the chemicals used
are both toxic and extremely corrosive so this
will not be for everyone.
The recipe for the silvering solution is
given in Texereau's book. Before silvering
the mirror was cleaned with lots of conc nitric
acid followed by distilled water. I found
silvering with the mirror suspended upside down
in the solution to be the most straight forward
way. A strip of wood was glued to the back
of the mirror using silicone adhesive and used
to support the mirror. Prior to the
silvering solution the mirror was first left in
a tin chloride solution.
After 15 minutes in the silvering bath the
mirror was removed to reveal a good if somewhat
bloomed silver coating. Further polishing
removed the bloom to leave a brilliant finish.
Silver coatings are assumed only to have a
life of 6-12 months before tarnishing. I
hope by designing an air tight mirror cell for this
telescope tarnishing can be delayed.
The mirror is now 6 months old and shows no sign
of ageing ( I'll keep you posted ).
Part 2 Making the Telescope
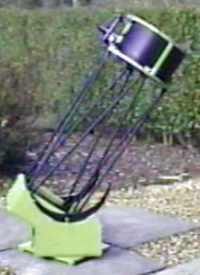
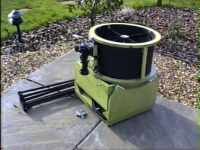
The major criteria for the design of the
telescope was that it should be easily
transportable car. A truss tube design
seem the obvious choice as these can easily be
broken down into their parts.
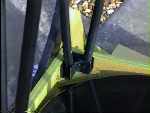
To keep the truss tubes linked when
dissembled the brackets remain on the tubes.
The spider features a drilled ball bearing in
a cadge give the necessary adjustment. 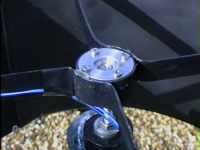
 As in scope 2 a
ring of resistors is used to keep the secondary
condensation free. As in scope 2 a
ring of resistors is used to keep the secondary
condensation free.
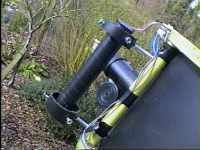
Red dot LED finders make ideal companions for
rich field scopes as you never lose track of
where in the sky the scope is pointing.
Instruction on how to make one are on Simon
Tomkins site.
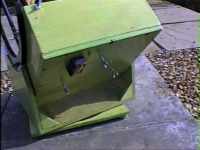
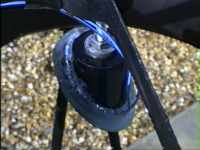
Power for the LED and heater comes from a 9V
battery beneath the mirror box. 1/2"
ply was used for the rocker box and mirror
box to keep the weight down.
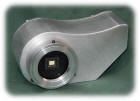
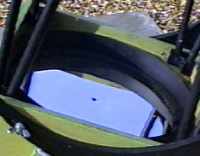
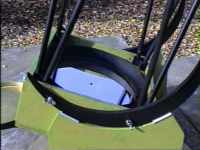
As mentioned before the mirror cell is design to
be air tight in the hope of postponing the silver
on the mirror tarnishing. The mirror
cell is actually an old cake tin whose lid is
replaced when the mirror is completely dry.
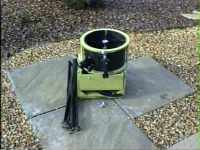
As it was designed to, the telescope packs up
so small it will even fit into the boot of a Honda
Prelude.
|